The Behringer PX3000 provides 48 TRS patch points in a single rack unit at an unbeatable price, with switchable normalling modes that give you flexibility in how signals route by default. It is a practical and affordable way to add patching capability to a playback or IEM rack where you need to re-route signals on the fly. While the build quality is not as robust as premium alternatives, it handles the job well for stationary or light-touring applications.
01 · What it does—and what that changes in your rig.
Product overview
Start with the payoff, then work through how it functions, where it fits, and the details that change a real build.
The payoff
Patch Bay decisions, organized around the whole rig.
The PX3000 is a 48-point TRSTip-Ring-Sleeve — a 1/4″ jack with three contacts carrying a balanced signal or a stereo pair. A guitar plug with one extra ring.patch bayA panel of front-facing jacks wired to everything behind it — re-route any signal with a short cable instead of climbing behind the rack. — 24 front-facing jacks mirrored by 24 rear jacks — squeezed into a single rack unitThe standard slice of rack height: 1U = 1.75″. A 3U box takes three slices; half-rack gear pairs two units side by side in one.. Its job is routing flexibility: instead of hard-wiring every connection in your rack permanently, the patch bay becomes a hub where you can redirect signals without touching the gear itself. In a playback rig or IEMIn-Ear Monitor — earpieces that replace floor wedges, feeding each player their own mix. The reason this whole rack exists. rack, that means you can swap a failed device out of the signal chain, add a last-minute piece of outboard, or hand off a monitor mix to a different output path in seconds rather than minutes.
Documented outputs
00 destination connections
Documented inputs
0Based on documented inputs
Rack space
1UBuilder checks available rail space
Behringer product panel1U · 0W
Function
How it works in the path
The switchable normallingA patch bay default path: the top jack feeds the bottom with nothing plugged in. Inserting a cable breaks (full) or taps (half) that path. modes are what make this more than a passive breakoutA cable that splits one multichannel connector (like a DB25) into individual plugs — the octopus that turns 8 channels into 8 XLRs. panel. Full-normal means rear-connected signals flow through automatically unless interrupted by a front patch cable; half-normal lets the rear signal pass while also making it available at the front without breaking the connection; open means no default routing at all. At load-in, you set the normalling mode per channel to match your rig's default state, so your standard signal flow requires zero patch cables. At show time, a single cable inserted front-panel overrides whatever you've pre-configured. The 130mm depth is shallow enough to live comfortably in a shallow rack or case.
Best fit
Where it earns its place in the rack
This is the right call for a stationary install, a rehearsal-room rack, or a fly-date IEMIn-Ear Monitor — earpieces that replace floor wedges, feeding each player their own mix. The reason this whole rack exists. rig that doesn't get thrown into a truck every night. At $49 and 1UThe standard slice of rack height: 1U = 1.75″. A 3U box takes three slices; half-rack gear pairs two units side by side in one. with no power draw, the value proposition is hard to argue with for anyone who needs basic patch capability without budget for a Neutrik or Switchcraft-built bay. If your rig does serious touring — nightly packing, road cases with gear shifting around, connectors getting yanked regularly — the plastic construction and lighter-duty jacks will eventually show it. In that context, step up to a steel-chassis alternative. But for the working musician's in-ear rack that lives in a foam-lined case and gets set up with care, this does the job cleanly.
In the rack
Details worth deciding before load-in.
Label every rear jack before the first show — a strip of white gaff and a marker takes five minutes and will save you significant grief when you're tracing a signal path under pressure at soundcheck.
Set normallingA patch bay default path: the top jack feeds the bottom with nothing plugged in. Inserting a cable breaks (full) or taps (half) that path. mode per channel to match your default rig signal flow before closing the case; that way your standard routing requires zero front-panel patch cables and the bay stays clean until something actually needs rerouting.
Mount it toward the front of a shallow rack or case — with only 130mm of depth it won't fight for space, and keeping rear connections accessible matters when you need to re-patch behind the panel.
Use it as a deliberate failure-recovery point: route the outputs of critical playback devices through the bay so that if a unit dies mid-show, you can redirect to a backup source with one cable pull rather than reaching behind the rack.
02 · Know the whole path before you buy.
Signal path
Learn the route as a block diagram: source, product function, transport, and destination. Select any block to see what enters, what changes, and what leaves.
Interactive block diagramAuto-looping · hover, focus, or tap to hold a stage
Port-type signalProduct functionSystem boundary
Follow one signal from source to destination
Each block answers the same three questions: what arrives, what changes here, and what leaves.
01 · Connection · selected
¼-inch TRS
01 · Connection
2 bidirectional connections
¼-inch TRS
Connection
2 bidirectional ports
Connector
¼-inch TRS
Signal
analog audio
03 · What this product asks of the rest of the system.
Compatibility
Treat connector names as the start of the check—not the answer. These are the boundaries that determine a complete working path.
Best fit · Patch Bay
Use it when 1U and 130 mm of depth fit the case.
Plan the companion path
Complete the path with upstream and downstream gear that matches connector, direction, signal type, protocol, and wiring standard.
Connector boundary
Documented connectors: ¼-inch TRS. Match connector, direction, and signal type—not shape alone.
04 · Every connector, grouped by job.
I/O ports
Switch the product view and the documented port inventory updates with it—hardware and data stay side by side.
Every connector, grouped by job.
Switch panels to keep the hardware view and the documented port list in sync.
Front panelRear panel
All documented ports for Behringer PX3000 Ultrapatch Pro
Port
Panel
Connector
Direction
Signal
Channels
TRS 1-24 (Front)
front
¼-inch TRS
bidirectional
analog audio
24
TRS 1-24 (Rear)
rear
¼-inch TRS
bidirectional
analog audio
24
Showing 2 of 2 documented physical ports.
05 · Compare the decision, not just the price.
Alternatives
The rows are organized around fit, power, I/O, and system role so a cheaper unit cannot hide a more expensive workflow.
PX3000The Behringer PX3000 provides 48 TRS patch points in a single rack unit at an unbeatable price, with switchable normalling modes that give you flexibility in how signals route by default. It is a practical and affordable way to add patching capability to a playback or IEM rack where you need to re-route signals on the fly. While the build quality is not as robust as premium alternatives, it handles the job well for stationary or light-touring applications.View gear →
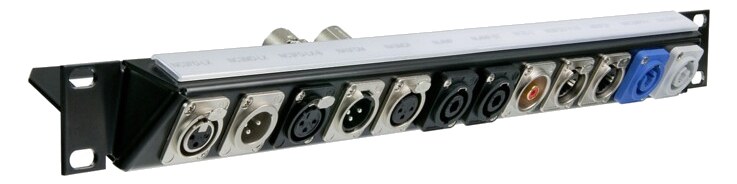
NZP1RU-12The Neutrik NZP1RU-12 provides a clean row of 12 XLR pass-throughs from front to rear panel, making it easy to present organized connections on the back of your rack while keeping the front accessible for patching. Neutrik connectors ensure reliable, road-worthy connections. This is essential infrastructure for any touring rack where you want quick, repeatable hookups at each venue.View gear →
MMVPThe Switchcraft MMVP is a professional-grade TT (bantam) patch bay offering 48 patch points in a single rack unit. The normalled configuration means signals pass straight through until you patch over them, which is perfect for establishing default signal routing in your rack while maintaining the flexibility to re-route on the fly. A staple in studio and broadcast installations that also works well in complex playback rigs.View gear →
R196-D25NFThe Redco R196 breakout panel converts a single DB25 connector on the rear into eight individual XLR connections on the front, which is essential when interfacing DB25-equipped gear like the Apollo x16 or RedNet A16R with standard XLR cables. It eliminates the need for bulky DB25 fan-out snakes dangling from the back of your rack. One panel per DB25 port keeps your wiring tidy and professional.View gear →
Placement is only the start. Builder checks space · depth · weight, power headroom, dependencies, and compatible signal paths around this exact catalog item.Open in Builder